Getting started
From a new account to a workflow that has run once, in about ten minutes.
On this page
Before you start#
- A work email address you can open now. Cadrix sends a verification link to it.
- For any step that uses an AI model, the account or API key you hold with your model provider. Cadrix connects to the provider you choose, with your own key. See Connections.
Create your account#
Signing up creates your company (called an organisation inside the app), a first workspace named Personal Workspace, and you as the organisation owner.
Go to app.cadrixflow.com/signup. You can also choose Start free on cadrixflow.com.
On Create your company, fill in Company name, Your name, Work email and a password.
The password needs at least 8 characters, with upper and lower case letters, a digit and a special character.
Tick the box to accept the Terms and the Privacy Policy, then choose Create company.
The page changes to Check your inbox. Open the email and follow its link.
Sign-up asks for a work email address, and rejects disposable email addresses.
Verify your email#
The email has the subject Verify your Cadrix account. The link inside works for 24 hours. When you open it you see Email Verified Successfully, and you can sign in.
If nothing arrives, check your spam folder, then use Resend the email on the Check your inbox screen. It is available again after a short countdown. For more, see I did not get the verification email.
Sign in#
Go to app.cadrixflow.com/signin and enter your email and password. If you forget the password, choose Forgot password?. The reset link lasts 15 minutes and works once.
Find your way around#
You land on Home. It shows a prompt box, your recent runs, and a Needs you panel for runs that need attention. The left rail has six areas: Home, Build, Operate, Knowledge, Library and Govern.
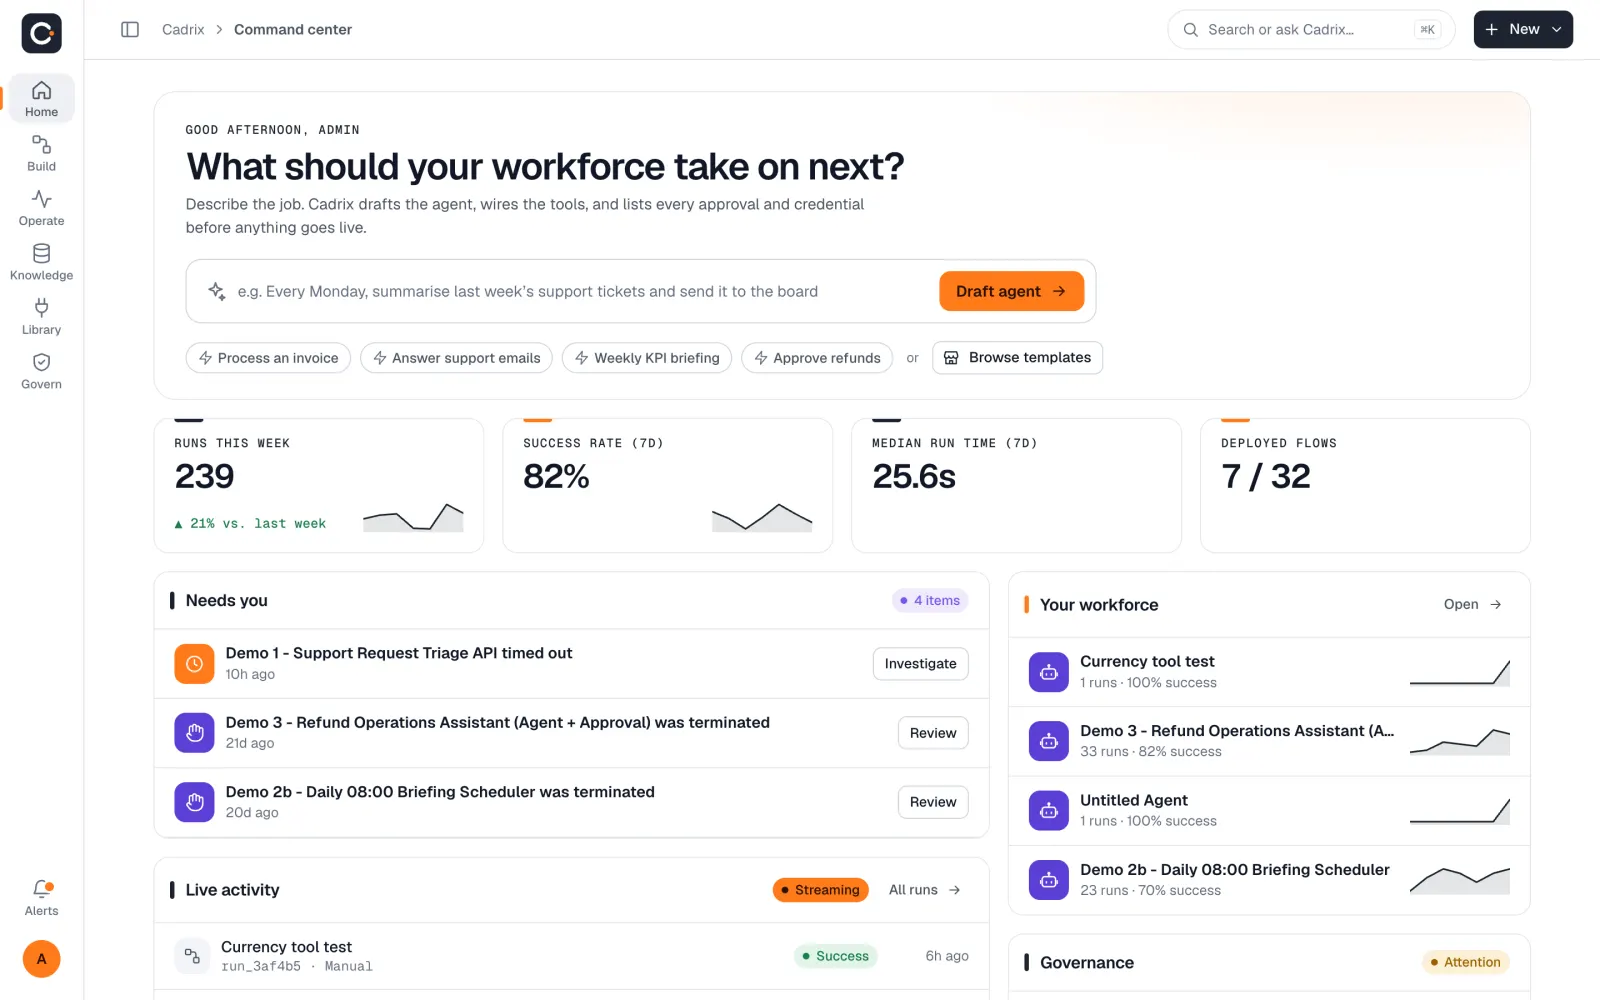
The workspace name sits at the top of the left-hand panel. Everything you build lives in the current workspace. See Workspaces, roles and people for how workspaces work.
Build your first workflow#
A workflow is a set of connected steps. The quickest start is to describe the job and let Cadrix draft it, then check every step yourself.
On Home, type the job into the prompt box. For example: Every Monday, summarise last week's support tickets and send it to the board. Then choose Draft agent.
You can also go to Build, then Workflows, and use the new-workflow button. Choose Agentic workflow (multi-step automations with triggers, agents, tools, branches and human approvals) or Conversational workflow (a chat experience over your knowledge and tools, ready to embed). The same dialog offers Describe it and let Cadrix draft it and Use a template.
Drafting needs a model. In the draft dialog, pick a model and a Connection (your provider key). If the list says No connection yet, add one first under Library → Connections.
Cadrix creates a draft and tells you to review each step before deploying. Open each step on the canvas. Fill in anything blank and pick a connection wherever a step needs one.
Give the workflow a name at the top of the canvas (Untitled workflow), then save it with the save button.
Say what starts it, what it should look at, what it should do, and who must approve what. Cadrix's own examples include Process an invoice, Answer support emails, Weekly KPI briefing and Approve refunds.
Run it#
With the workflow open, choose the Test workflow button in the top bar. A chat panel opens.
Type a message, or fill in the form if the workflow starts with a form. Watch the steps light up on the canvas as they run.
Open Operate → Runs. Your test appears in the list. Open it to see every step. See Runs and tracing.
When you are happy, make the workflow live. See Make a workflow Active.
What next#
- Add your own documents so agents can answer from them.
- Connect email, calendars and other tools.
- Add a human approval step before anything sensitive happens.
- Check your plan's limits. The free Starter plan has 1 member, 5 workflows and 1,000 runs a month.